DIY Halloween Decorations Inspired by Pottery Barn
Every October, the same thing happens. You scroll past a Pottery Barn Halloween collection, with its moody mercury glass, oversized black taxidermy ravens, and perfectly aged skeletons, and you admire it for a minute. Then you see the price tags and close the tab.
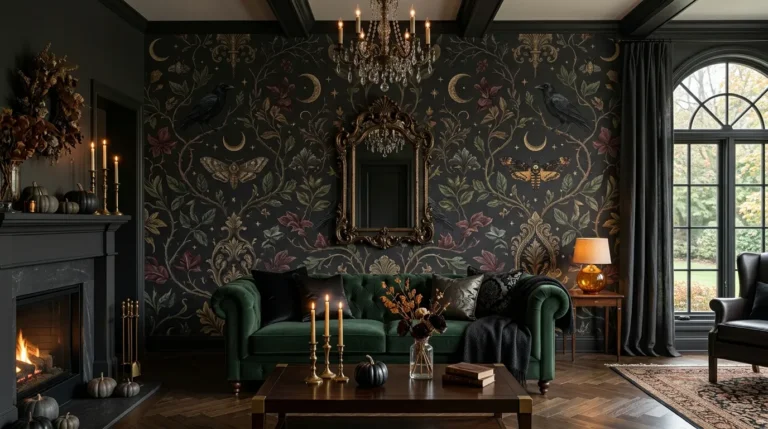
The good news is that the look is far more achievable than the prices suggest. Pottery Barn’s Halloween style relies on a handful of repeatable ideas: a muted palette, natural textures, vintage-looking finishes, and a few statement pieces. Once you understand those ideas, DIY Halloween decorations become a rewarding way to get that elevated, collected-over-time feel on a modest budget.
This guide breaks down the aesthetic, the materials worth buying, and eight projects you can complete over a few evenings.
What Makes Pottery Barn Halloween Decor Distinctive?
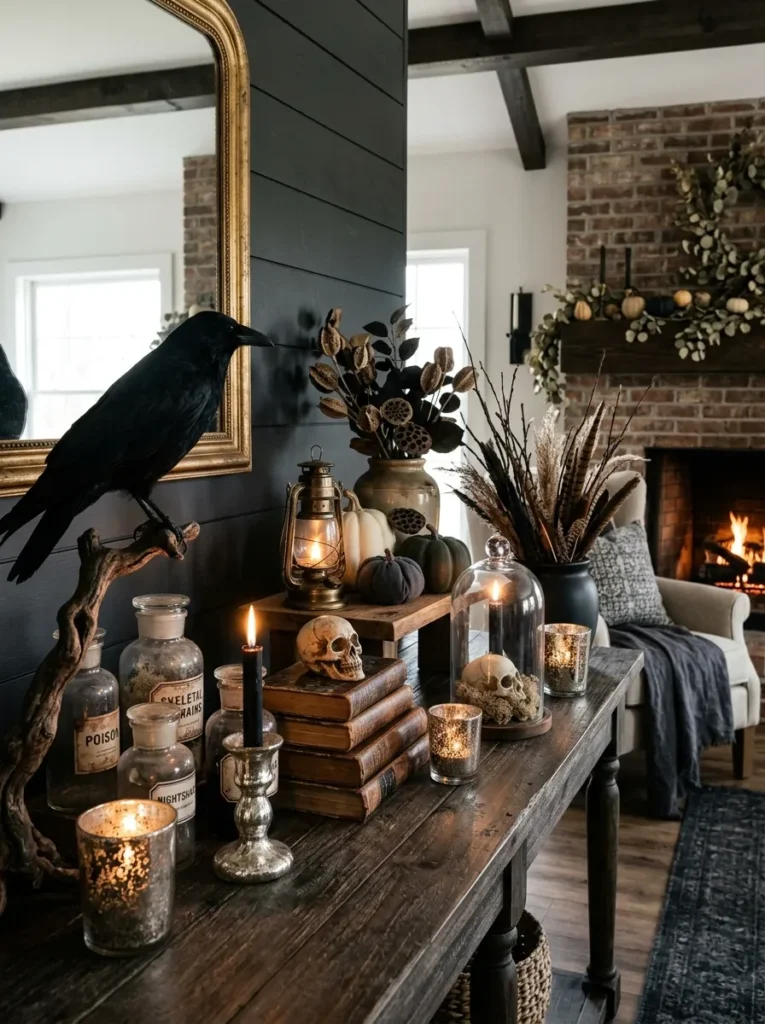
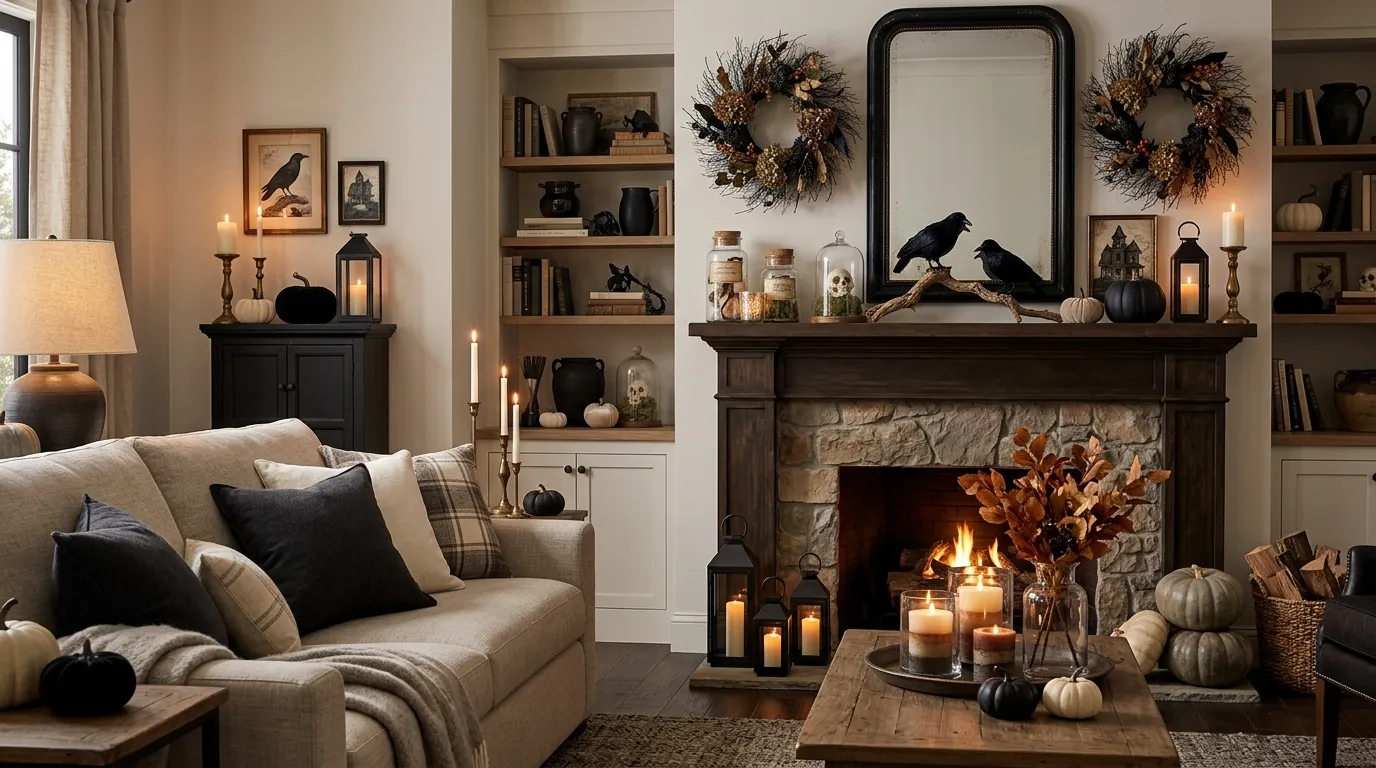
Before picking up a glue gun, it helps to know what you’re recreating. Most mass-market Halloween decor is loud: bright orange, neon green, and plastic everywhere. The Pottery Barn approach is closer to a gothic-meets-farmhouse look, and it tends to follow a few consistent principles:
- A restrained palette. Black, charcoal, ivory, aged white, and muted gold or copper, with the occasional pumpkin orange or deep plum.
- Natural and tactile materials. Think dried branches, burlap, linen, wood, wax, and glass instead of shiny plastic.
- Vintage patina. Pieces look like antique apothecary finds or heirlooms, not party-store purchases.
- Scale and repetition. Groupings of three or five objects at varying heights, and a few oversized items that anchor a room.
- Subtle spookiness. Skulls, bats, ravens, and cloches appear, but they’re styled with restraint.
Keep these principles in mind as you plan your DIY Halloween decorations. A cohesive color story matters more than any single project.
Gather Your Supplies First
Most of these projects share the same basic materials, so a single shopping trip can cover everything. A good starter kit includes:
- Matte black spray paint and flat black acrylic paint
- Antique white or cream chalk-style paint
- Dark brown or black wax (or a diluted brown acrylic wash) for aging
- A hot glue gun and glue sticks
- Twine, burlap ribbon, and black velvet or satin ribbon
- Dried branches, moss, and faux greenery
- Small foam brushes and a stiff bristle brush
- Fine sandpaper
- Tea light candles, preferably flameless for safety
Thrift stores, dollar stores, and estate sales are your best allies. Old glass jars, mismatched candlesticks, wooden bowls, and picture frames are all raw material for a great Halloween project, and their worn character often looks better than anything brand new.
Project 1: Faux Mercury Glass Candle Holders
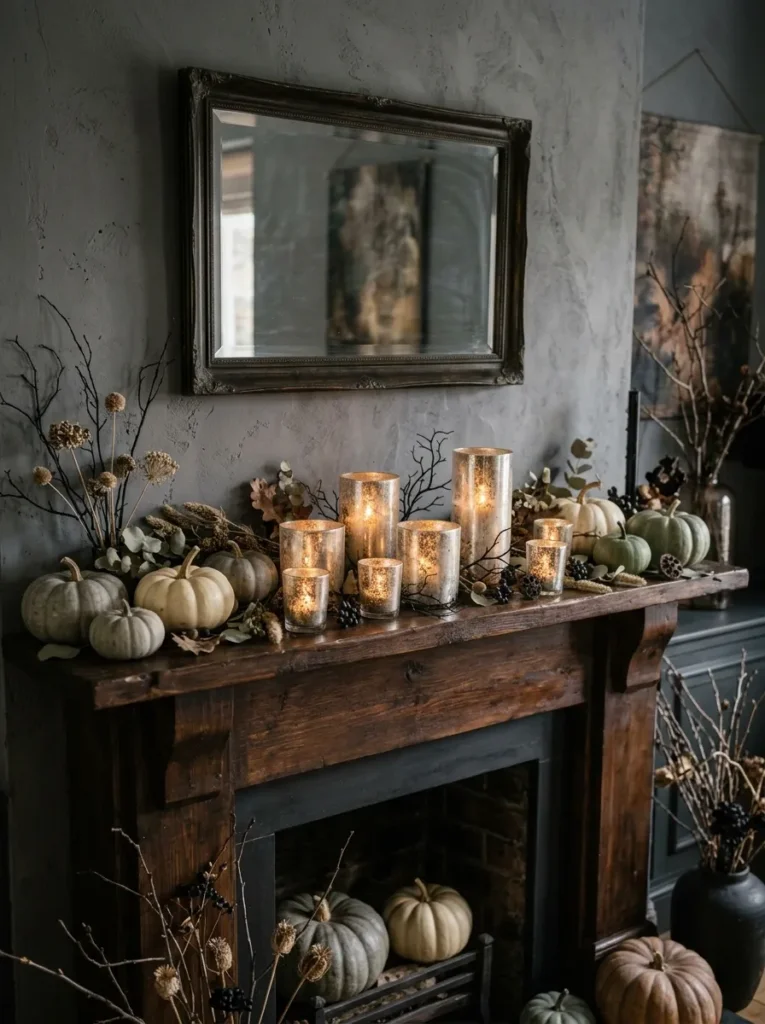
Mercury glass is a signature of the Pottery Barn look, with its soft silvery, slightly mottled shine. You can mimic it with a few supplies.
What you’ll need: Clear glass votive holders or small jars, a spray bottle, white vinegar, water, and mirror-effect or silver spray paint.
How to make it:
- Clean the glass thoroughly and dry it.
- Mix equal parts water and vinegar in the spray bottle.
- Lightly mist the inside of the glass with the mixture.
- Immediately spray a light coat of mirror-effect paint inside the glass.
- Dab or mist again with the vinegar solution and let it run, which creates that mottled, antique effect.
- Let it dry completely, then add a flameless tea light.
Group several in different sizes along a mantel or dining table. The cloudy finish glows beautifully in low light and looks far more expensive than it is.
Project 2: Aged Apothecary Jars
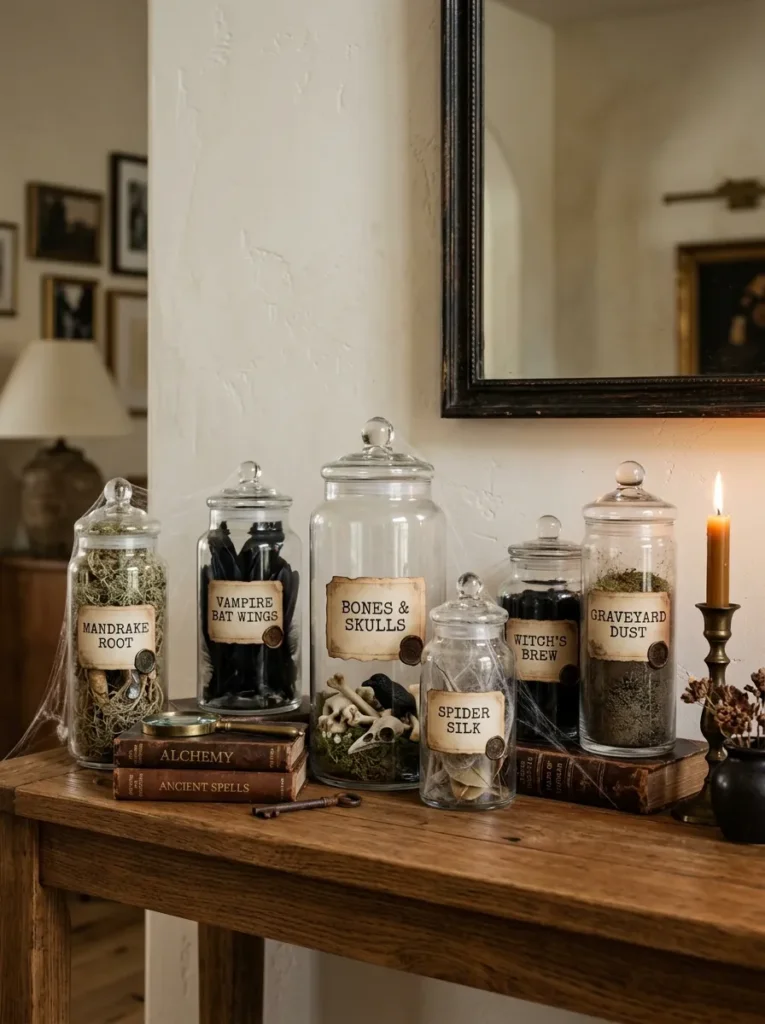
Apothecary-style jars bring a haunted-laboratory feel without looking cheesy. They’re also one of the easiest DIY Halloween decorations for beginners.
What you’ll need: Glass jars with lids, printable labels or craft paper, a tea bag or coffee for staining, and a few filler items such as dried moss, faux spiders, or small bones.
Steps:
- Print labels with playful names like “Raven Feathers,” “Witch’s Whispers,” or “Bat Wing Dust” in an old typewriter or script font.
- Tear the edges and brush the paper with strong tea or coffee. Let it dry for an aged look.
- Glue the labels onto the jars.
- Fill the jars with moss, cotton “cobwebs,” dried flowers, or black feathers.
- Place them on shelves, bookcases, or a console table at varying heights.
For a more refined look, stick to two or three filler types rather than cramming everything in. Negative space keeps it elegant.
Project 3: Black Taxidermy-Style Ravens and Crows
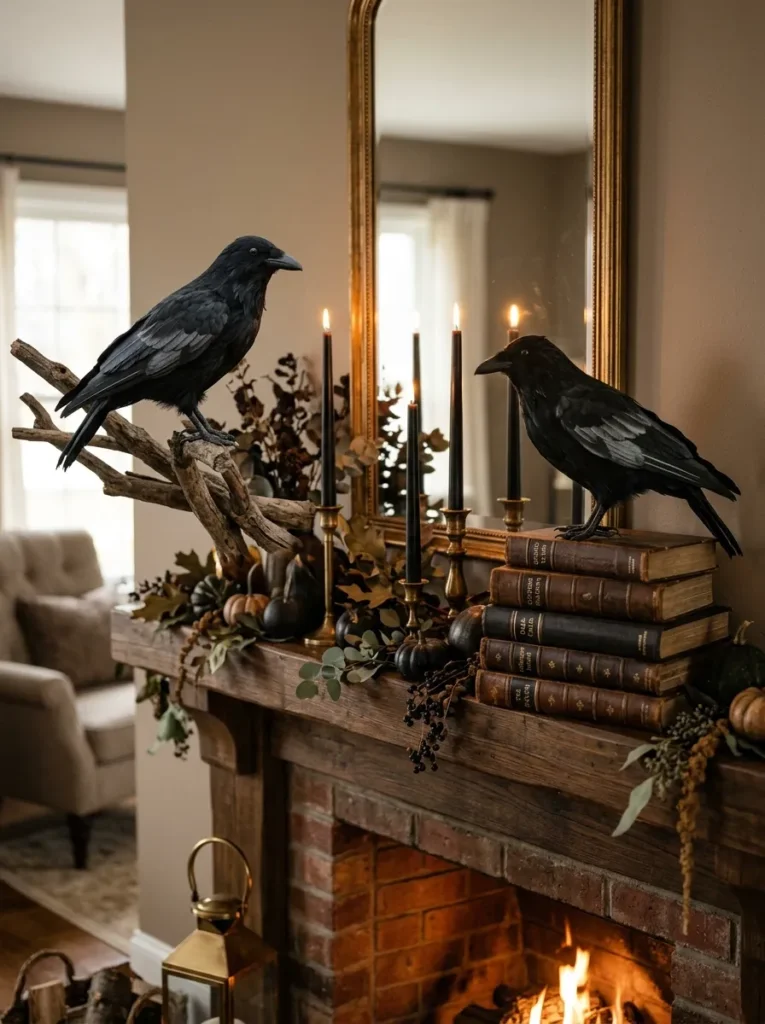
Pottery Barn’s oversized black birds are a popular Halloween statement piece. Craft stores sell inexpensive faux crows and ravens, and a few tweaks make them look luxe.
How to elevate store-bought birds:
- Spray them with matte black paint to unify cheap, shiny finishes.
- Dry-brush a tiny amount of gray or silver paint on the wing tips for depth.
- Perch them on a branch, a stack of old books, or the lid of a cloche.
- Group two or three together rather than scattering many.
A single raven on a mantel, framed by branches and candles, reads as deliberate and sophisticated.
Project 4: Glass Cloche Displays
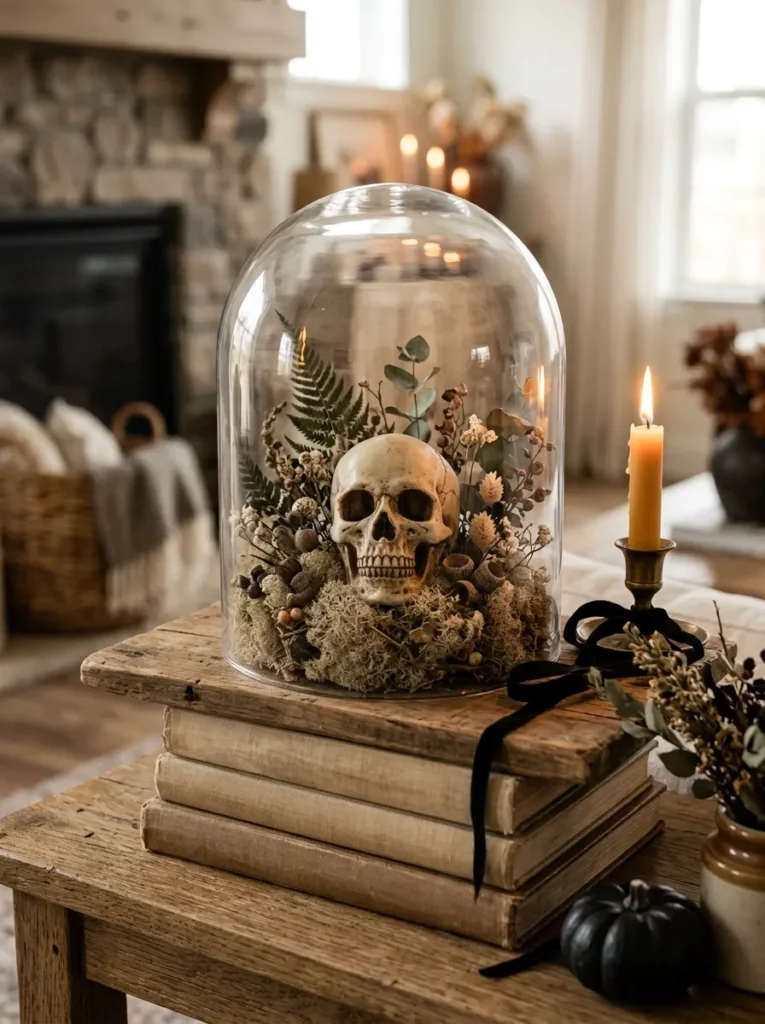
A cloche (the glass dome used for display) instantly adds a collected, museum-like quality. Real cloches can be pricey, but upside-down glass bowls, cake domes, or even large glass vases work well.
Ideas for filling a cloche:
- A small skull on a bed of moss
- A vintage-style book with a feather and a taper candle (unlit)
- Mini pumpkins with a sprinkle of faux cobweb
- A bundle of dried lavender or wheat tied with black ribbon
Place the cloche on a wooden board, a cake stand, or a stack of books for added height. This type of vignette is the quickest way to make DIY Halloween decorations feel like home decor instead of party decor.
Project 5: Painted and Aged Pumpkins
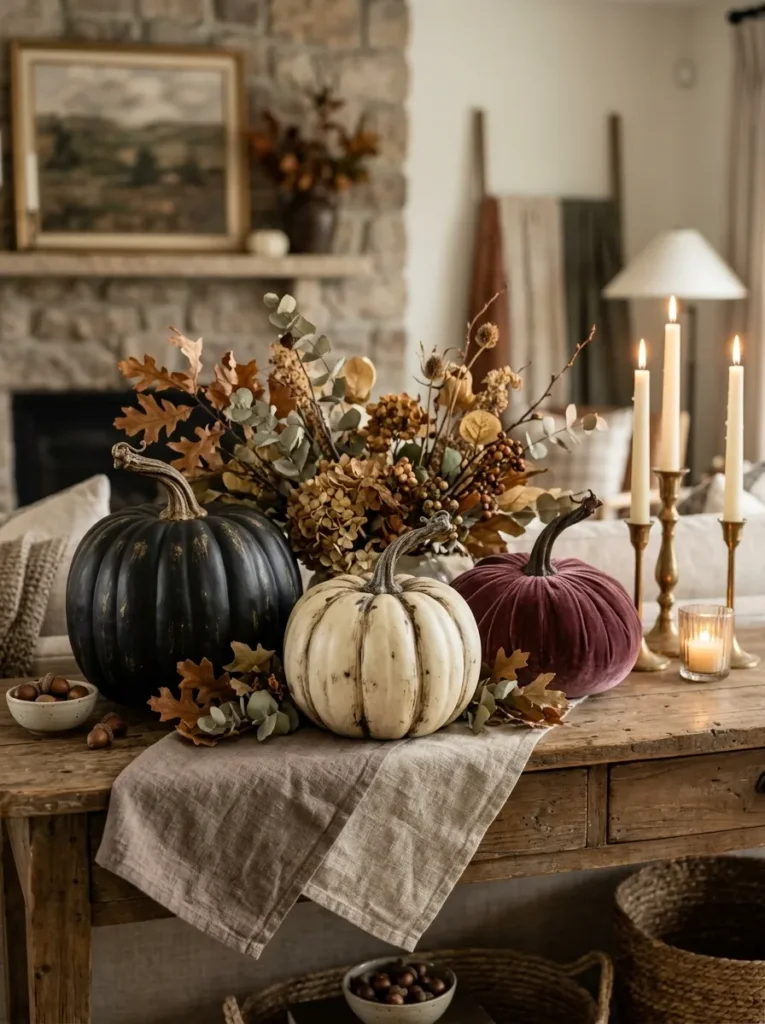
Pottery Barn favors pumpkins in muted, unexpected finishes. Craft pumpkins (foam or faux) are ideal for this because they last for years.
Three finishes to try:
- Matte black: Spray paint, let it dry, then lightly dust with gold or copper wax for subtle dimension.
- Aged white: Brush on cream chalk-style paint, then rub a little dark wax into the creases so it looks weathered.
- Velvety texture: Brush on a thin layer of craft glue and sprinkle on flocking powder, or use velvet fabric scraps for a plush, jewel-toned look.
Use real stems when possible. A slightly crooked, natural stem makes a faux pumpkin look authentic. Arrange three in varying sizes for a classic grouping.
Project 6: Gothic Wreath With Dried Elements
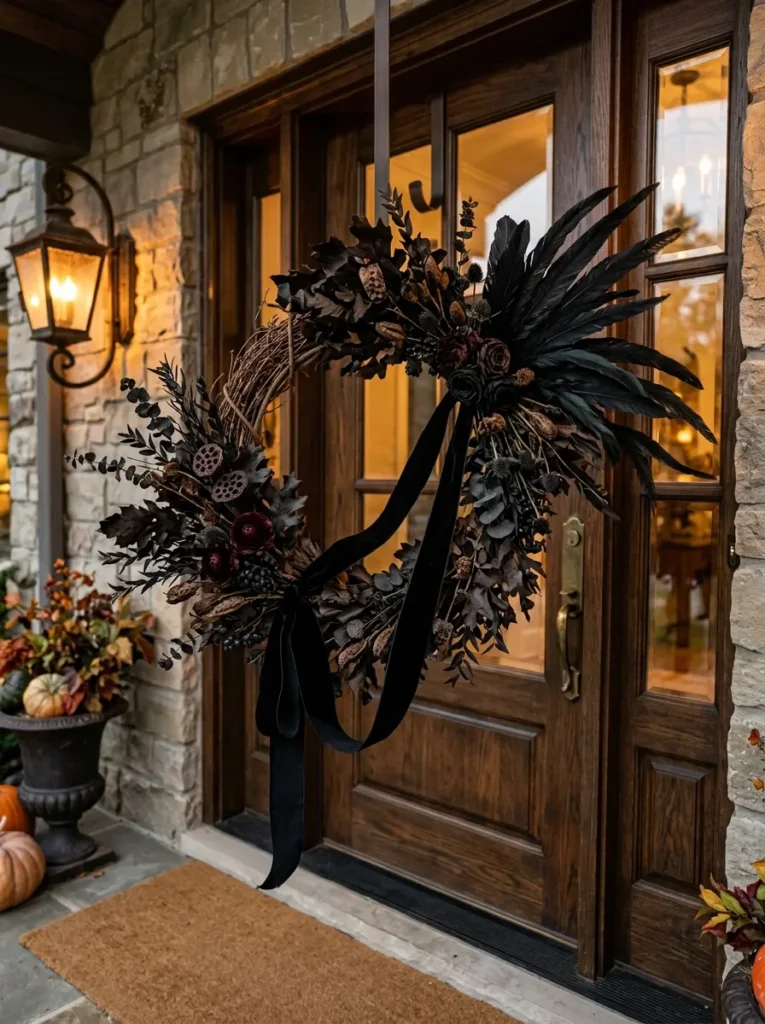
A front door wreath sets the tone for your whole home. Instead of a bright, plastic-heavy design, build a moody wreath using natural materials.
What you’ll need: A grapevine or wire wreath form, black or dark brown faux florals, dried foliage, black feathers, and ribbon.
How to assemble:
- Start with the base, wrapping a few strands of dark greenery around the form.
- Tuck in dried branches and seed pods at different angles.
- Add black feathers radiating outward from one side, which creates an asymmetric, designer look.
- Finish with a wide velvet ribbon tied in a loose bow or draped through the wreath.
Leave some of the form visible. Fullness is nice, but breathing room is what makes it look curated.
Project 7: Lantern and Candle Centerpiece
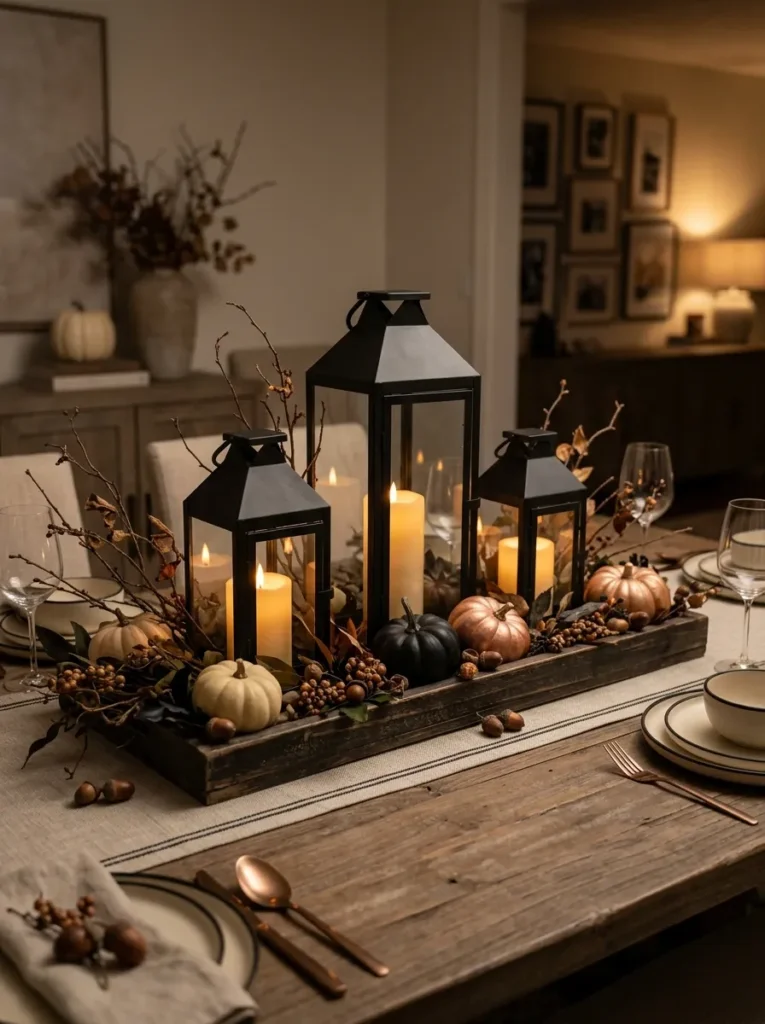
A moody centerpiece is the easiest way to bring your Halloween theme to the dining table or entryway.
What to do:
- Choose a wooden tray or an old cutting board as a base.
- Place two or three metal lanterns in different heights, painted matte black if needed.
- Add pillar candles (flameless works wonderfully and is safer around dried materials).
- Fill gaps with small pumpkins, branches, or a handful of acorns.
Stay with a limited color palette here. Black, white, and a single warm accent such as copper tends to look polished and intentional.
Project 8: Spooky Framed Art
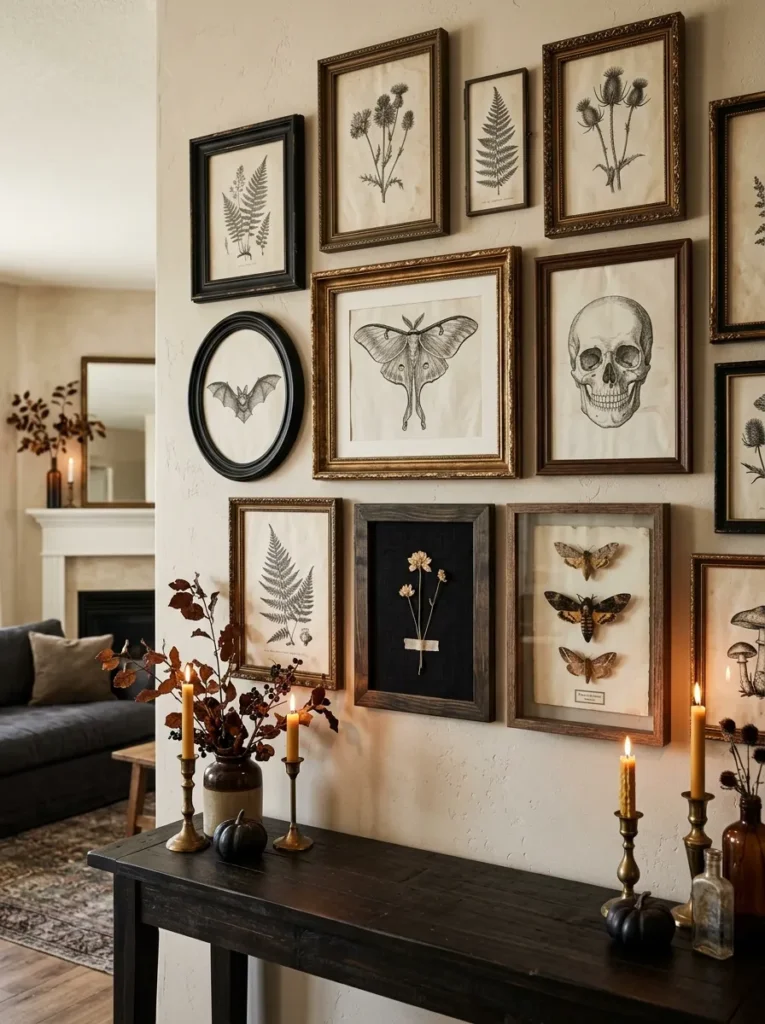
Gallery-style wall art adds personality, and it costs almost nothing when you use thrifted frames.
Easy approaches:
- Print vintage botanical or anatomical illustrations in black and white, with a bat, moth, or skull replacing the original subject.
- Frame a piece of black fabric with a single dried flower.
- Create a “specimen” display by mounting faux moths or butterflies on aged paper under glass.
Paint the frames black, bronze, or antique gold, and hang them together in a cluster for a gallery wall effect.
Styling Tips That Make DIY Look Professional
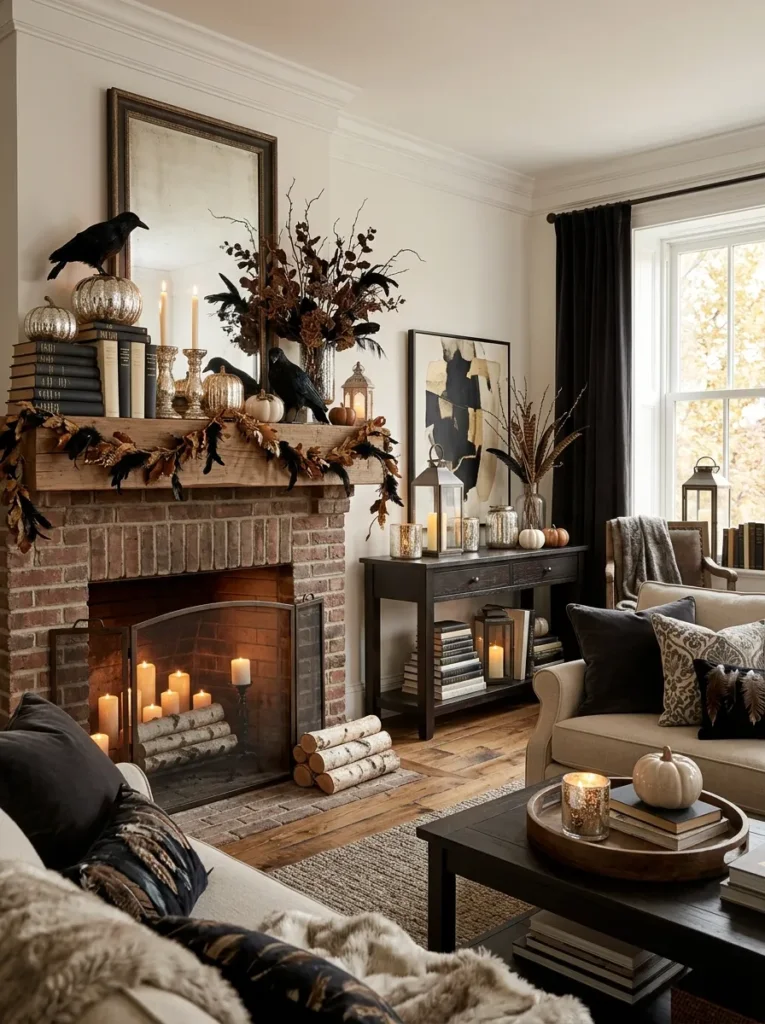
The difference between homemade and high-end often comes down to styling, not the projects themselves. Keep these pointers in mind:
- Vary heights. Use stacked books, risers, and cake stands to create layers.
- Edit ruthlessly. If a surface looks busy, remove two items.
- Mix textures. Pair glass with wood, velvet with burlap, and matte with a hint of metallic.
- Layer lighting. Soft candlelight, string lights, and lantern glow do much of the atmospheric work.
- Repeat your accents. If you use black feathers on the wreath, echo them on the mantel.
Budget and Time-Saving Strategies
You don’t need to complete every project in one weekend. Here is a practical way to spread out effort and cost:
- Start with spray painting. Do all painting in one session, since it requires ventilation and drying time.
- Shop secondhand early. The best jars, frames, and candlesticks sell quickly as Halloween approaches.
- Prioritize statement pieces. Choose two or three projects that will make the biggest impact, like the wreath, a mantel display, and the apothecary jars.
- Store carefully. Wrap delicate items in tissue and keep them in labeled bins so next year’s decorating takes minutes.
Many of these items can be reused, so investing a little effort now gives you a decor collection that keeps growing in value.
Common Mistakes to Avoid
Even simple projects can go sideways. Watch out for these common issues:
- Too many colors. Stick to a tight palette to maintain a sophisticated look.
- Overcrowding. Empty space makes your displays feel more deliberate.
- Skipping surface prep. Dust and oils cause paint to peel, so clean everything first.
- Using real flames near dried materials. Flameless candles give the same glow with much less risk.
- Rushing the aging process. Layer wax or washes gradually; you can always add more but can’t easily take it away.
Conclusion
Creating DIY Halloween decorations inspired by Pottery Barn doesn’t require expensive materials or advanced skills. It requires understanding what makes the style work: a muted palette, natural textures, aged finishes, and thoughtful arrangement. With mercury glass candle holders, apothecary jars, painted pumpkins, a gothic wreath, and a few well-styled vignettes, you can turn your home into an elegant, atmospheric space that feels both spooky and sophisticated.
Start with one or two projects, thrift what you can, and build your collection gradually. By next October, you’ll have a signature seasonal style that is entirely your own.
Frequently Asked Questions (FAQs)
- What colors work best for Pottery Barn-style Halloween decor?
Black, charcoal, cream, and aged white form the foundation of this look. Add warmth with muted gold, copper, or burnt orange, and consider a deep plum or forest green as a subtle accent. The key is restraint: choose a few colors and repeat them throughout your home.
- Are DIY Halloween decorations safe to use around candles?
They can be, but it’s smart to take precautions. Dried branches, paper labels, feathers, and fabric are flammable, so flameless LED candles are the safest option for most of these projects. If you do use real candles, keep them well away from dried materials and never leave them unattended.
- How can I make cheap craft-store decor look more expensive?
Paint is your best tool. A coat of matte black or antique white unifies mismatched pieces, and a light dry-brush of metallic paint or dark wax adds depth. Beyond that, styling matters: group items in odd numbers, vary the heights, and leave some empty space so each piece can stand out.